Poll Everywhere for Faculty
- 06 Feb 2023
- 6 Minutes to read
- Contributors

- Print
- DarkLight
- PDF
Poll Everywhere for Faculty
- Updated on 06 Feb 2023
- 6 Minutes to read
- Contributors
- Print
- DarkLight
- PDF
Article summary
Did you find this summary helpful?
Thank you for your feedback
Poll Everywhere is an online polling program that you can use to easily create polls in your class for attendance taking, engagement, and knowledge checks. If you’d like to use this with your classes and don’t already have an account, email bbhelp@uml.edu and we will set up an account for you.
Watch the Poll Everywhere Getting Started Video to show you how to set up Poll Everywhere with Blackboard after receiving confirmation of your new account.
Connecting with Blackboard
First, you will need to add Poll Everywhere to your Blackboard course so the two will be connected and talk to each other. On your Home Page, use the Build Content drop down to select Poll Everywhere.

Name the line Poll Everywhere and hit submit.

Back on your Home Page, scroll to the bottom and click on the Poll Everywhere link that has been created.

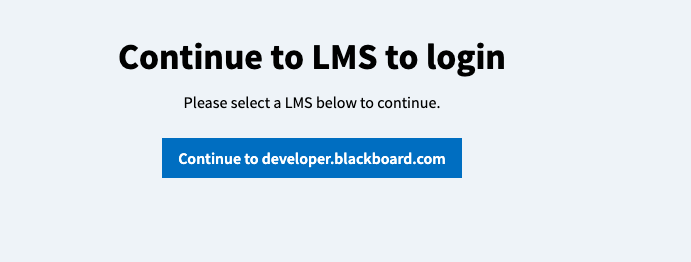
Click on the blue Continue button. You will then be able to sync your Roster to Poll Everywhere.
Groups & Syncing Your Roster

If you plan to start using Poll Everywhere right away, sync your roster on the first day of classes. To do this, go to the Participants tab and click on LMS Courses. On the next page, click Sync Roster. You may need to resync your roster if students add and/or drop your course after you have synced your roster.


On the right hand side, you will see your list of groups. If the student is listed with a certain group, the corresponding circle will be filled in. If you accidentally ungroup a student (by clicking a different colored circle), you’ll just need to re-sync the roster.
Students Registering
Students will receive an email about registering after you have synced your roster. If they have already registered for another course at UML, they will not receive another email to register and they will not need to register again. If a student's answers are not going through or they are repeatedly getting an error that they are not registered, they need to make sure that they are logged in on the app or the website. They can also log into Poll Everywhere and click forgot password. If this doesn't work, try resyncing your roster and have them try again. If the student logging in with their UML credentials and resyncing the roster does not work, please have them contactbbhelp@uml.edu.
Presenting a Poll
When your question is presented on screen for your students, you can show it in a variety of ways.
The screenshot below is the Responses view. Students will be able to see how everyone answered. (Note: When you hit the Present button, it will go into full screen and students will only see the question part of this screen. The right-side options will not be visible to students.)
The screenshot below is the instructions view. Students will see the question and the answer choices, but will not know how the other students answered.

Once you've ended the time for the class to answer the question, you may choose to show the Correctness screen to show which of the answers was correct.
.png)
In the instructor view, there is a button for Response History (this is located at the bottom right corner of your screen). The Response History page provides a table view of how many people answered each response, how they responded (i.e. phone, the link, etc.), and then the individual responses for each student.
The three images below are what the students see when a question is presented. They will need to log in to the presentation, then sign in with their credentials if they are using the website. If they are using the app, they will need to log in with their credentials the first time and the app will save them going forward. Then the question and answer choices will be presented to them. The bar at the top allows them to customize their personal space.


.png)

Reports & Gradebook
To create a report, select the box next to the question you would like to create a report for and click on Create Report.
.png)
After selecting Create Report, a popup will appear on the right side of the screen. You will always want to select Gradebook if you want it to go into your Grade Center in Blackboard.

On the next screen, you have the option to rename your report. This will make it clear what it is when it's exported. Click on the Rename link next to the title to change it.
.png)
Once the report has been processed, you'll be able to view the overall grade and participation for each student. If you have weighted grading turned on, the weighted grade column will also be included in this view. That column will appear as numbers.
.png)
Weighted grading (currently in beta features) means that by default it applies a 1 or 0 to each question. It allows you to set different points for different answers, i.e. a correct answer could have extra points. This should not be used for participation as it will not process the math correctly if the report goes out as weighted to the Grade Center. To use weighted grading, go to your Profile and click on features lab then, toggle weighted lab on and hit apply lab settings.


When the report is generated, you'll see a variety of marks in the report and in a variety of colors. Use the Legend drop down, for an explanation of the marks on your report. (Legends will vary based on your question type and settings for the question.)

Archived Responses
If you are using questions across multiple sections or year to year when your course runs, you will want to clear out the previous classes' answers and save the report. To do this, you'll select the question or questions you want to archive. A pop-up will ask you what you want to name the report. Then, it will save the report and clear the responses.


Types of Questions
Poll Everywhere has several question choices that you can use during your class. To start, from the Home tab, click on the Activity button. From there you will be able to select which type of question you would like to use.


Only certain questions, such as multiple choice, competition and clickable image can be marked as correct or incorrect. Those question choices that are not able to be marked correct or incorrect can be used for participation. LaTex (a system of typing out more complex math equations) can be used in the questions.
Folder structure
To keep your questions organized you can sort them by topic or by class or however you would like to label the folders. You can have folders within folders (i.e. different sections or semesters of the came course). To create a folder, click on Folder, name the folder, and click Create Folder. To create a sub folder, open the new folder and follow the same process.
.png)


Once your folders have been created, you can use the box next to the question to select and bring up a list of options. From here you will be able to move, duplicate, create a report, etc.
 Adding to PowerPoints

If you have a PC, Windows will have Poll Everywhere added into the ribbon, integrated right into it. If you have a Mac, it's a separate program that you will need to have open while running your Polls.
If the computer you are presenting on in your classroom does not have Poll Everywhere installed, please email help@uml.edu and it can be installed for you.
Watch the Poll Everywhere PowerPoint Video to learn more about integrating Poll Everywhere into your PowerPoint slides.
Was this article helpful?